Stones, with their natural allure and timeless elegance, have been a preferred choice for various architectural and interior design projects. From majestic monuments to modern homes, stones have graced our spaces for centuries. However, like all natural materials, stones too are susceptible to wear and tear. Cracks, whether due to natural aging, external pressures, or other factors, can mar the beauty of these stones. But fret not! Repairing cracked stones is possible, and with Home Pride’s expertise, it’s easier than you might think.
Understanding the Causes of Cracked Stones
Before diving into the repair process, it’s essential to understand the root causes of cracks in stones:
Natural Aging: Over time, stones can develop cracks due to natural aging and weathering.
External Pressures: Heavy loads, ground movements, or even construction activities nearby can exert pressure leading to cracks.
Temperature Fluctuations: Extreme temperature changes can cause stones to expand and contract, leading to cracks.
Improper Installation: If stones aren’t installed correctly, they might not have even support, leading to cracks over time.
Home Pride’s Comprehensive Guide to Repairing Cracked Stones
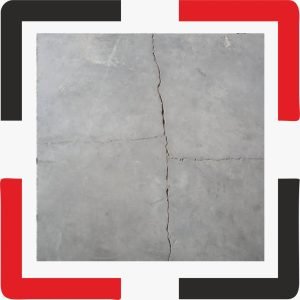
Assessment: Begin by assessing the extent and depth of the crack. This will help determine the best repair method and the products required.
Cleaning: Before any repair, ensure the cracked area is clean. Remove any loose debris or dirt from the crack using a brush.
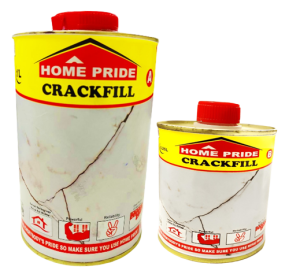
Choosing the Right Adhesive: Home Pride’s Stone Adhesive is specially formulated for stone repairs. It offers a strong bond, ensuring the stone remains intact post-repair.
Filling the Crack: Carefully apply the adhesive into the crack using a spatula or a filler knife. Ensure the adhesive is applied evenly and fills the crack completely.
Leveling: Once the crack is filled, level the surface using a flat tool to ensure it’s flush with the stone’s surface.
Drying: Allow the adhesive to dry completely. The drying time might vary based on the adhesive type and the environmental conditions.
Polishing: After the adhesive has dried, polish the stone to restore its natural shine. Home Pride’s Stone Care range offers products that can give your stone a shining surface, making the repair virtually invisible.
Sealing: To prevent future cracks and ensure the longevity of the repair, consider sealing the stone. Home Pride’s Sealers provide a protective layer, safeguarding the stone from external factors.